Mastering Juicy Baked Chicken: Your Guide to Tender Breasts Every Time
Tired of dry, rubbery chicken breasts? You're not alone. For many home cooks, achieving truly juicy, flavorful oven-baked chicken breasts feels like an elusive culinary unicorn. But what if we told you the secret to consistently tender, moist chicken is surprisingly simple and requires less than 30 minutes of active cooking time? This comprehensive guide will equip you with the essential techniques and insider tips to transform your standard
baked chicken breasts into a succulent masterpiece, every single time. Say goodbye to bland and hello to brilliant!
The Science of Succulence: Why Most Baked Chicken Fails (and How We Fix It)
The primary challenge with chicken breasts is their lean nature. Unlike fattier cuts, they have very little connective tissue or fat to protect them from drying out during cooking. High heat, if not managed correctly, can quickly squeeze out what little moisture they hold, leaving you with a chalky texture. However, with a few clever strategies, we can turn this culinary challenge into a triumph.
Our approach focuses on three core pillars:
- The Brine: A quick saltwater soak that actively locks in moisture.
- High Heat, Fast Bake: Maximizing flavor and tenderness by cooking quickly.
- Precision & Rest: Ensuring perfect doneness without overcooking, followed by crucial resting.
These principles, combined with thoughtful seasoning and preparation, are your roadmap to perfectly
juicy baked chicken breasts that are tender, flavorful, and incredibly versatile.
The Secret to Succulent Chicken: Why Brining is a Game-Changer
If there's one tip that will revolutionize your baked chicken breasts, it's brining. This isn't just a suggestion; it's a non-negotiable step for truly tender results. But what exactly is a brine, and why does it work so effectively?
Understanding the Magic of a Saltwater Soak
A brine is simply a solution of salt dissolved in water. When chicken breasts soak in this solution, two key processes occur:
- Osmosis: The salt solution penetrates the chicken meat. As the muscle fibers absorb the water, they become plumper and hold onto that moisture more effectively during cooking.
- Protein Denaturation: The salt helps to denature (unravel) the muscle proteins. This tenderizes the meat even before it hits the oven, making it less likely to seize up and become tough. It also helps the muscle fibers relax, allowing them to retain more moisture as they cook.
The result? Chicken that's not only juicier but also more seasoned from the inside out. Even a brief 30-minute brine can make a dramatic difference, transforming an otherwise dry breast into a remarkably tender cut. While you can extend the brine up to 2 hours for even more profound effects, exceeding this can sometimes lead to a slightly rubbery texture.
Ingredient Notes for Your Brine
When preparing your brine, the type of salt matters:
- Kosher Salt: Our preferred choice. Different brands of Kosher salt have different densities. For instance, Diamond Crystal Kosher salt is lighter by volume than Morton Kosher salt. If using Morton, you might use slightly less to avoid over-salting, though for a quick 30-minute brine, the difference is often negligible.
- Avoid Table Salt: Table salt is much denser and contains anti-caking agents that can give a metallic taste. Using it in equal measure to Kosher salt will likely result in an unpleasantly salty brine. Stick to Kosher or a good sea salt.
The brine is truly the single biggest upgrade you can make for consistently
juicy baked chicken breasts. Don't skip it!
Beyond the Brine: Perfecting Your Prep and Seasoning
Once your chicken breasts have had their luxurious saltwater spa treatment, the next steps are crucial for developing flavor and ensuring an appealing, lightly caramelized crust.
Essential Prep Steps for Optimal Results
Before seasoning, make sure your chicken is ready for its close-up:
- Pat Dry, Thoroughly: This step is non-negotiable. Excess moisture on the surface of the chicken prevents seasoning from sticking and inhibits browning. Instead of roasting, the chicken will steam in its own juices, resulting in a pale, less flavorful exterior. Use paper towels and pat each breast until it feels completely dry to the touch.
- Optimal Chicken Choice: For even cooking and better slicing, aim for large, boneless, skinless chicken breasts (around 10-12 oz each). If your breasts are smaller, simply adjust the baking time down by a few minutes. If they are particularly thick at one end, you can gently pound them to an even thickness for more consistent cooking.
Crafting Your Flavor Profile: Seasoning with Confidence
The beauty of
baked chicken breasts is their versatility. While a simple seasoning blend is often best, you have endless options to customize the flavor to your meal.
Our Go-To Seasoning Blend:
- Olive Oil: A light coating of olive oil (or any neutral oil like avocado or grapeseed) helps the seasoning adhere to the chicken and promotes beautiful browning.
- Garlic Powder: Provides an aromatic base without the risk of burning fresh garlic.
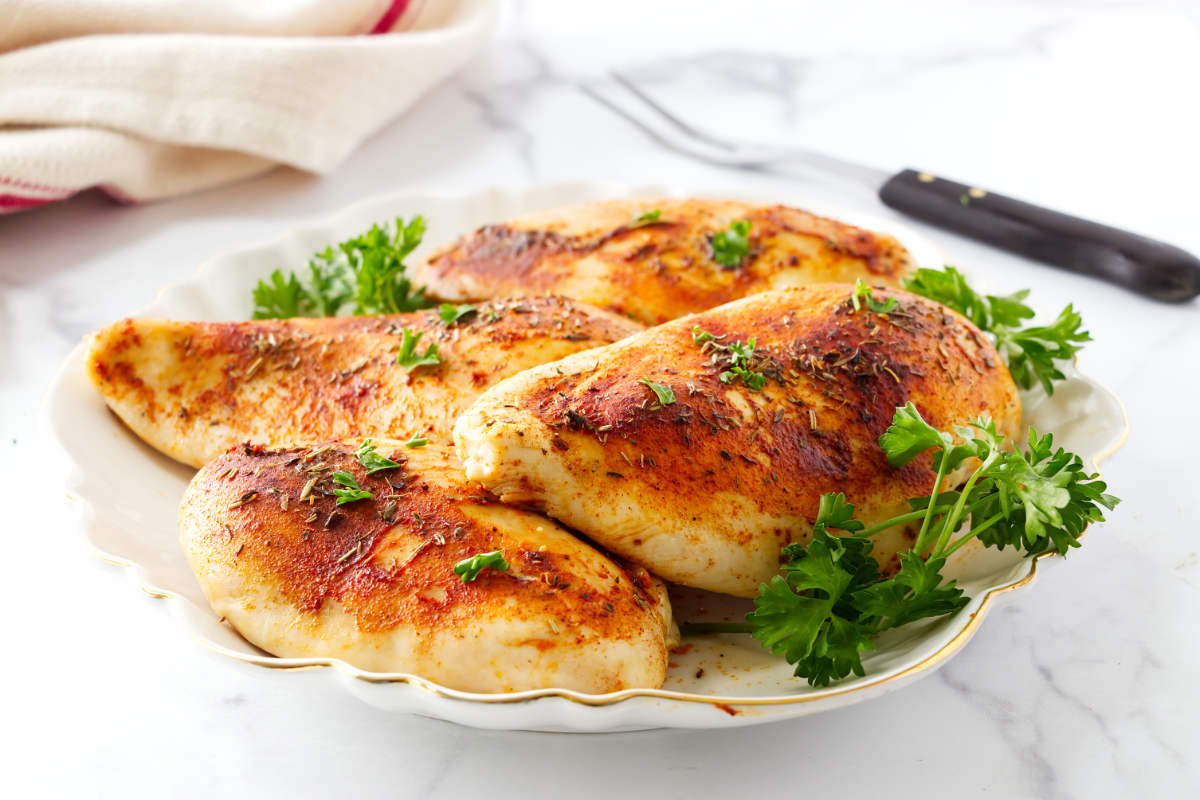
- Smoked Paprika: Adds a wonderful smoky depth and rich color.
- White or Black Pepper: White pepper offers a milder, earthier bite, while black pepper delivers a sharper, more classic warmth. Choose based on your preference.
- Herbs de Provence: A fantastic blend for aromatic, herbaceous notes, particularly good for a Mediterranean-inspired dish.
Seasoning Flexibility: Unleash Your Creativity
This recipe is incredibly adaptable. Feel free to swap in your favorite spice blends or individual spices:
- For a Tex-Mex twist: Try chili powder, cumin, and a pinch of cayenne.
- For Italian flair: Use Italian seasoning, dried oregano, and a touch of red pepper flakes.
- For an earthy, savory profile: Experiment with onion powder, thyme, and rosemary.
Pro Tip: Season All Sides! Don't just sprinkle seasoning on top. Lift the chicken breasts and generously coat the undersides as well for full, balanced flavor in every bite.
High Heat, Fast Bake: The Art of Oven Roasting
The cooking method itself plays a pivotal role in achieving perfectly juicy
baked chicken breasts. We're aiming for a high-heat, fast-bake approach that cooks the chicken quickly and efficiently, minimizing moisture loss.
Setting the Stage for Success: Oven Temperature and Equipment
- High Temperature Roasting: Preheat your oven to a robust 400-425°F (200-220°C). This high heat creates a beautiful crust through the Maillard reaction, sealing in juices quickly.
- Rimmed Sheet Pan: Always use a rimmed baking sheet. This prevents any juices from spilling into your oven and helps to contain the chicken, promoting roasting rather than steaming.
- Parchment Paper: Lining your baking sheet with parchment paper is a game-changer for cleanup. It also prevents the chicken from sticking to the pan, ensuring it lifts off cleanly without tearing.
Baking for Perfection: Time, Doneness, and Don't Flip
Once prepped and seasoned, your chicken is ready for its hot bath in the oven:
- Bake Until Done: For large, boneless, skinless chicken breasts (10-12 oz), this typically takes between 18-25 minutes. Smaller breasts will cook faster, so shave off a few minutes. Remember, specific cooking times can vary based on oven calibration and the thickness of your chicken.
- No Need to Flip: Thanks to the high heat and efficient convection in most modern ovens, there's no need to flip the chicken breasts halfway through. This helps maintain an even cooking temperature and prevents unnecessary handling.
While estimated times are helpful, the most critical factor in achieving juicy results is cooking to the correct internal temperature.
Mastering the Finish: Temperature, Resting, and Slicing
This is where many home cooks falter, often overcooking chicken in fear of undercooking. Knowing when to pull your chicken from the oven and what to do next are vital steps.
The Thermometer is Your Best Friend
An instant-read meat thermometer is the single most valuable tool for perfectly cooked chicken. There’s no guesswork involved.
- Pull at 157°F (70°C): The USDA recommends chicken be cooked to 165°F (74°C). However, chicken continues to cook after being removed from the oven – this is called "carry-over cooking." By pulling your baked chicken breasts at 157°F, resting will allow their internal temperature to rise to the safe 165°F without any risk of overcooking.
- Where to Measure: Insert the thermometer into the thickest part of the chicken breast, avoiding any bone if you're using bone-in cuts.
The Crucial Art of Resting
Once the chicken hits 157°F, transfer it from the hot pan to a clean cutting board. This next step is non-negotiable:
- Rest for 5-10 Minutes: Allow the chicken to rest, uncovered, for at least 5-10 minutes. This allows the muscle fibers, which have tightened up during cooking, to relax. The juices, which have migrated to the center of the breast, will redistribute evenly throughout the meat.
- Why it Matters: If you slice the chicken immediately, all those precious juices will flood your cutting board, leaving you with a drier piece of meat. Resting ensures that every bite is as juicy as possible.
Slicing for Serving
After resting, slice your
juicy baked chicken breasts against the grain. This shortens the muscle fibers, making each slice even more tender and pleasant to eat.
Versatility and Meal Prep: Maximizing Your Tender Chicken
One of the greatest benefits of mastering juicy
baked chicken breasts is their incredible versatility. This baseline recipe serves as a perfect foundation for countless meals throughout the week.
Endless Culinary Possibilities
Your perfectly cooked chicken breasts are a blank canvas, ready to be transformed:
- Main Dish: Serve simply with your favorite side dishes – roasted vegetables, mashed potatoes, a fresh salad, or fluffy rice.
- Salads: Slice or dice and add to green salads, Caesar salads, or Cobb salads for a protein-packed meal.
- Pastas: Stir into creamy pasta dishes, vibrant pesto pasta, or hearty baked ziti.
- Sandwiches & Wraps: Thinly slice for gourmet sandwiches, paninis, or healthy wraps.
- Stir-fries & Tacos: Cut into strips or cubes and incorporate into quick stir-fries or flavorful tacos and fajitas.
- Soups & Casseroles: Shred or dice for comforting chicken noodle soup, chicken chili, or bubbling casseroles.
The Ultimate Meal Prep Hero
Because these chicken breasts slice cleanly and stay juicy even when chilled, they are ideal for meal prepping. Cook a batch at the beginning of the week, and you’ll have a healthy, versatile protein ready to go for lunches and quick dinners. Store leftovers in an airtight container in the refrigerator for up to 3-4 days.
Conclusion
Mastering juicy
baked chicken breasts is less about complicated techniques and more about understanding a few fundamental principles: the power of a quick brine, the efficiency of high-heat roasting, and the precision of temperature monitoring combined with crucial resting. By incorporating these essential tips into your cooking repertoire, you'll consistently achieve tender, flavorful chicken that will elevate your meals and simplify your weeknight cooking. So, grab your thermometer, embrace the brine, and get ready to enjoy perfectly baked chicken breasts, every single time.